Get Started
How to takeoff quantity from drawing?
Main steps to generate bill of quantities from drawing.
- Sign Up for AppisCAD
- Add CADtools to your Library
- Download AppisCAD software
- Open AutoCAD and type MYLIBRARY in the command line
- Click on the ‘Sync Web’ to connect with your web library
- Select the desired command ‘Run, Draw tags, Draw Tables, Bill of Quantities’
Sign Up for AppisCAD
On the home page at the right side menu, click on the LOGIN/REGISTER

In the Register Box type your email address and your password then press the Register button, you can change your password at any time later, just click on Forgot Password when you are logging in and a URL link will be sent to your email address, click on this link or copy-paste to the browser to reset your password.

After registration, you are enabled to add CAD Tools to your Library
Add CAD Tools to your Library
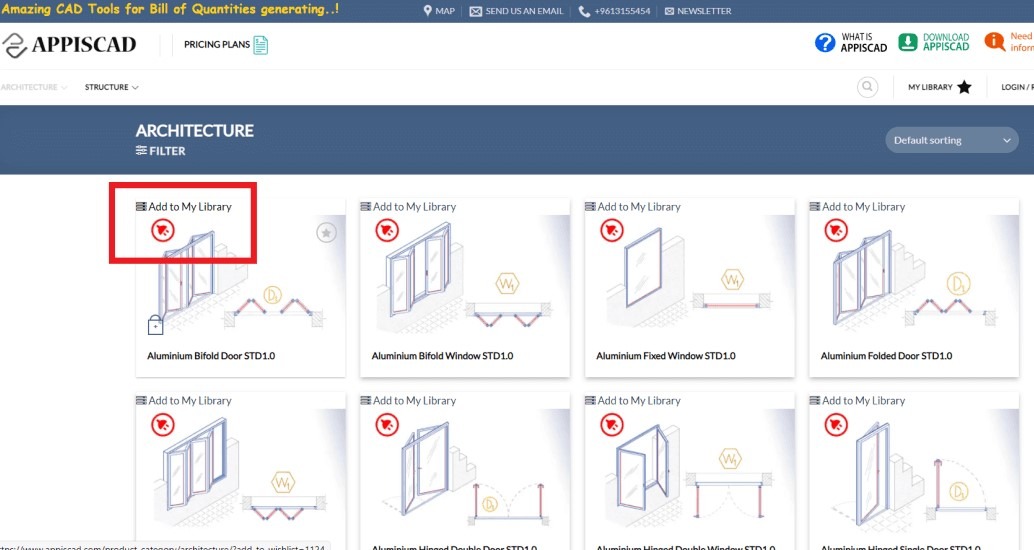
In the Main menu, select Architecture, Furniture, Civil, MEP, Landscape, or Structure to display all related CAD Tools (plugins), then click on the Add to My Library tag in the upper right corner of the CAD Tool picture to add it to your Library. Continue adding CAD Tools to your Library as you like.
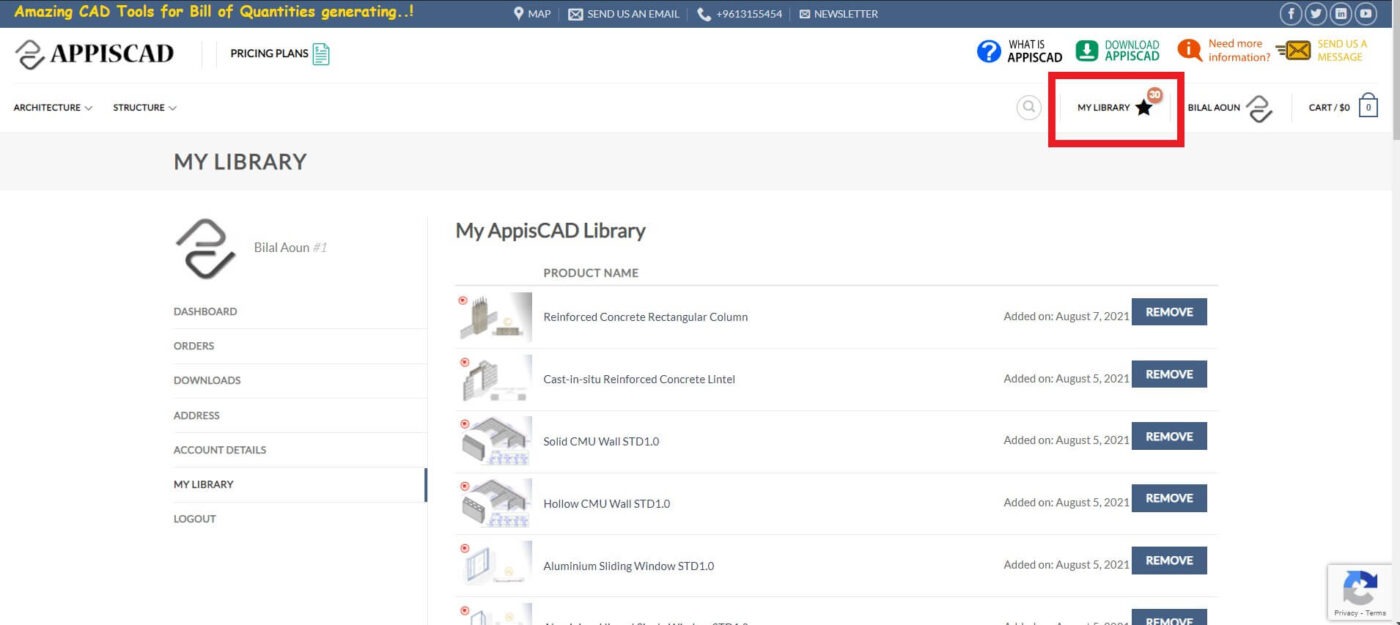
Let’s go to the Library Page to see how it looks, at the top of the page click on MY LIBRARY. On the My Libary page, you are enabled to remove any plugin you need.
Download AppisCAD
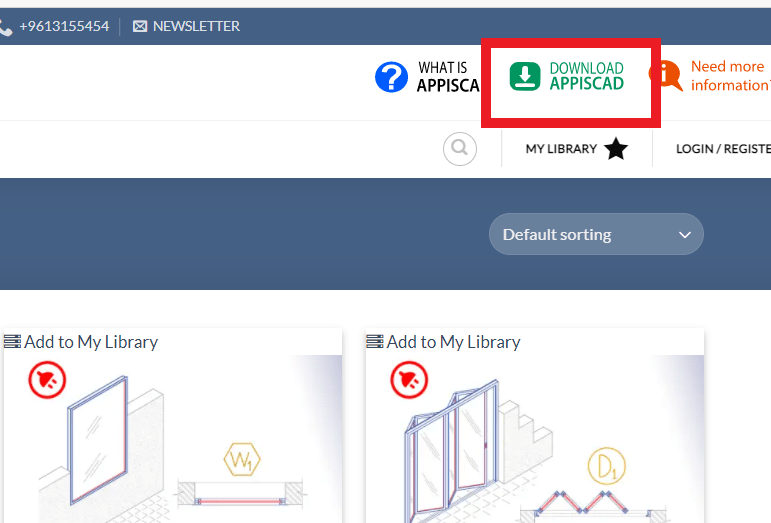
At the top of the page, click on the green Icon titled Download AppisCAD ![]() the AppisCAD download page opens, click on the button titled Download Now and wait until the .msi file is downloaded to your PC.
the AppisCAD download page opens, click on the button titled Download Now and wait until the .msi file is downloaded to your PC.
AppisCAD is now available at Autodesk Appstore. Press here to download AppisCAD from Autodesk
Double click on the .msi file to run the executable file, If you see a “Windows protected your PC” notification, like the below figure, please do not be concerned, this is a new version of the software so the Windows network might not recognize the program automatically, so they send you this message just as a precaution, to proceed with the download, click on “More info”, then “Run anyway”.


The download wizard starts, as shown in the below figure.

Click Next, then follow the setup wizard instructions until the software is successfully installed.
After the successful installation, an AppisCAD folder should appear in the Windows start menu, and inside this folder, a shortcut named AppisCAD_Updater is to discover the latest update (new version), including new features, improvements, and bug fixes.

Now, this is the time to open an AutoCAD session and discover how to run AppisCAD and benefit from its amazing CAD Tools Library.
Open an AutoCAD session to start with AppisCAD tutorial
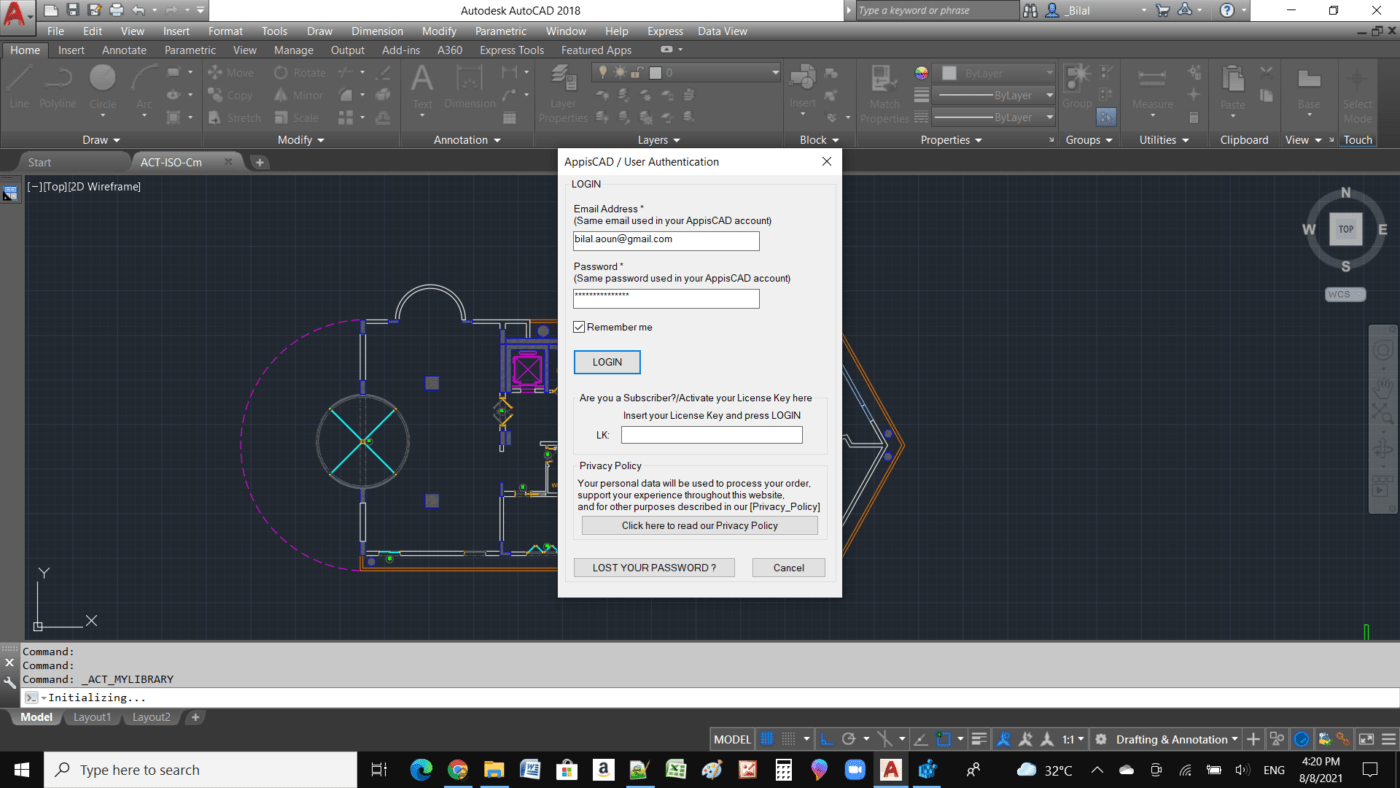
Open AutoCAD, in the command line type mylibrary then press enter to open the library dialog (or simply press on the My Library icon). As shown in the below figure, the Login dialog appears, type your email (the same email in appiscad.com account), then press LOGIN button to start downloading your AppisCAD Library at your local computer (Internet connection is required)
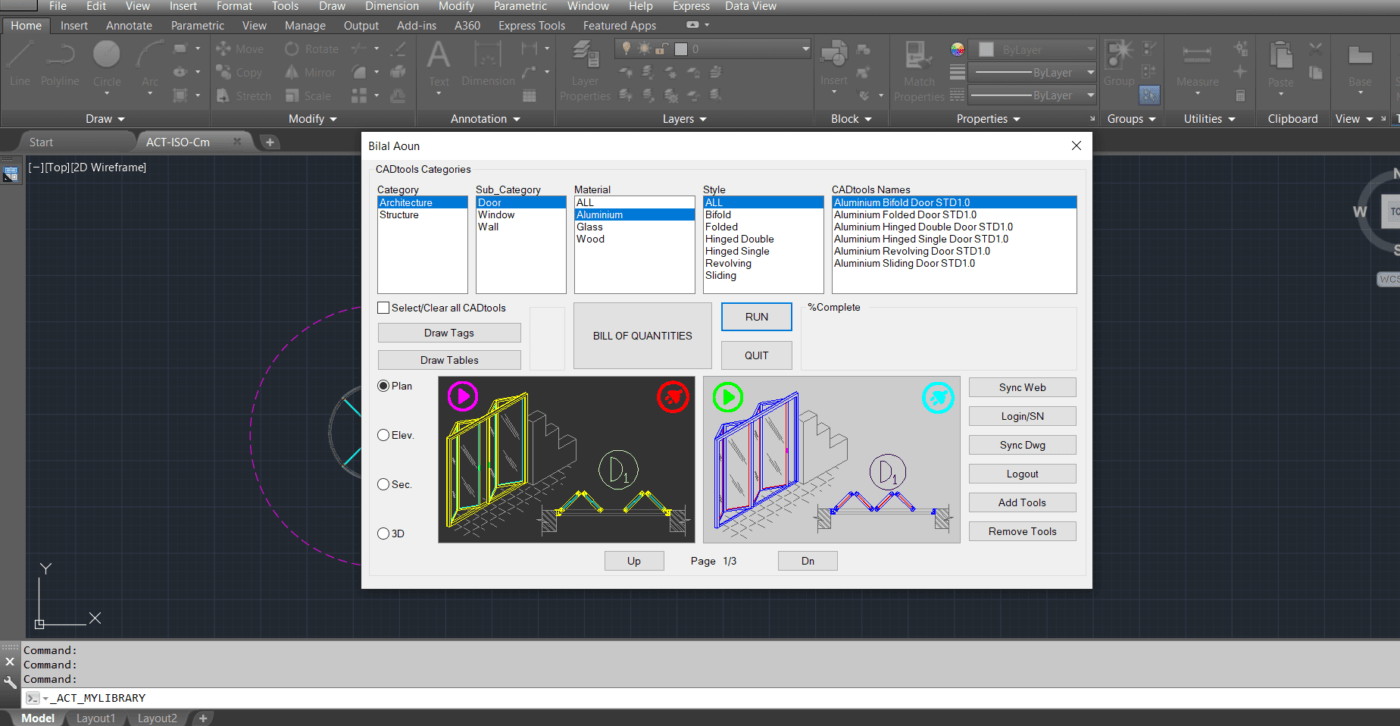
After downloading your library on your PC the Library dialog box appears as shown in the figure below. Select the CADtool you need then press on the button that executes the appropriate actions as follow:
- RUN: Insert/Draw the selected item (CAD Tools) into the drawing.
- Draw Tags: Add tags for similar objects.
- Draw Tables: Insert data table for similar objects.
- Bill of Quantities: Generate the bill of quantities for the whole or part of the drawing.
- Sync Web: Download/Update the CADtools/Applications to your Local Library from your Website Library. The CADtools can be added to your library on the AppisCAD website at any time, and then you can download the whole library to AutoCAD on your desktop by clicking the ‘Sync web’ button.
- Sync Dwg: In this process, you will scan the opened drawing to see if there are any CADtools that don’t exist in your library, and if so, add them.
- Remove Tools: Remove CADtools/Applications from both Local and Website Libraries.
For more details watch this Video Tutorial.


You must be logged in to post a comment.